The DIY Bulletin Board of all Bulletin Boards… for Less Than $13!
A DIY bulletin board is the perfect way to organize your house! It’s much cheaper than buying the pre-made ones, plus you can make them match your decor perfectly. Score!

We have a big, no huge, no, REALLY-EXCITING-KNOCK-YOU-OFF-YOUR-SEAT announcement coming very soon!!(Just for the record, no, I’m not pregnant again…). I don’t want to spoil it yet, but let’s just say my house needs to be REALLY REALLY REALLY REALLY clean. (Any guesses?)
*Note: When you click the links in this post, we may receive a commission at no extra cost to you.
Thus, the Page Household has been getting a complete overhaul lately. We have to do it fast, have to do it well, and of course, have to do it on a budget. One of my first projects? Tackling THIS nasty little thing…
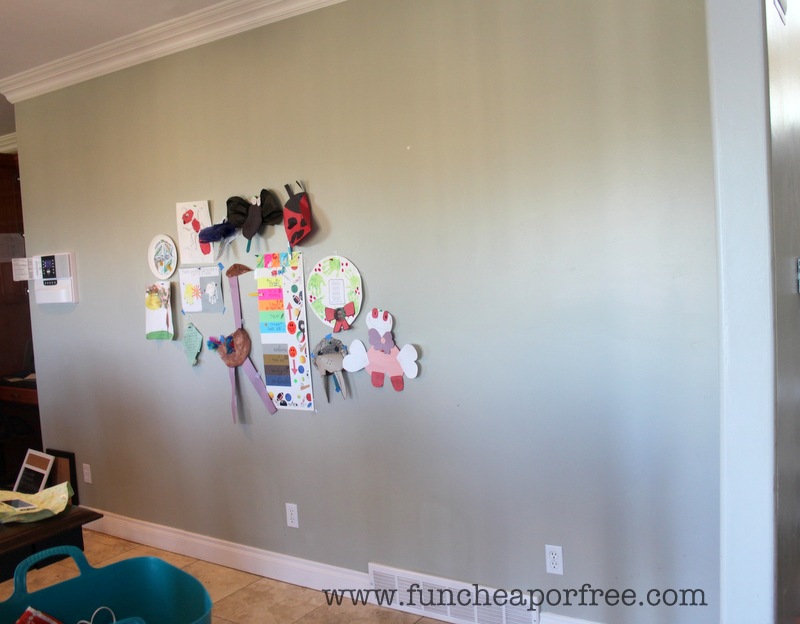
My really big, empty, random wall of clutter.
The wall has been completely empty the entire 1.5 years we’ve lived here because it’s SO HUGE, I simply don’t know what to do with it! It’s smack-dab in the middle of my kitchen so I didn’t want to start tossing random things up there, I wanted to make sure it was:
- Practical,
- Looked good, and
- We could leave it up forever. (I hate having to do, re-do, then re-do-do projects again.)
Thus, no commitment for the wall-of-vast-blankness.
WHY I NEEDED AN EASY DIY BULLETIN BOARD
One day I stuck Hutch’s amazing behavior chart up there. A few days later I pinned a preschool art project next to it. Then another.
Next thing you know, it looked like construction paper and glue sticks barfed up a baby on my wall.
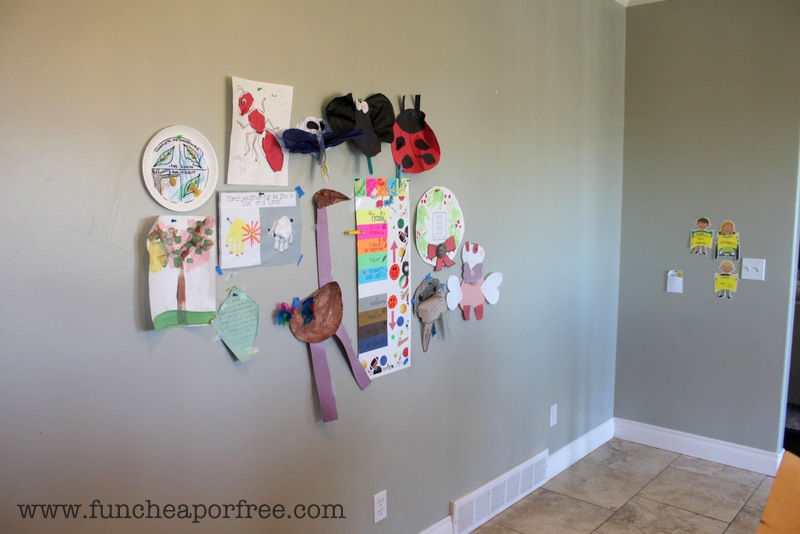
Very feng shui, eh? Not.
It was time to do something about it. I went to the web looking for a cute, yet practical (and HUGE because my wall is ridiculously large) cork board. The result?

I threw up a little in my mouth when I saw the prices. Seriously? $332 for 4×8 board? I’ll give that a big heck no.
HOW TO EASILY MAKE YOUR OWN BULLETIN BOARD
I decided to get crafty (there’s that “C” word again!!) and figure one out myself. This little beauty was my inspiration:

Adorable, heavy-duty wrapping paper that I planned to do something with someday. (Yeah, one of those purchases. Naughty Jordan!)
I headed to Home Depot in search of a large huge sheet of cork board. They didn’t have any, so I walked around poking boards with my fingernail trying to find the right…consistency, if you will.
I found this sound-deadening board and figured it would work like a champ:

It’s a composite-type board so it was soft, yet sturdy, didn’t easily crumble like styrofoam boards do, it was HUGE (4×8), and best of all? Was one of the cheapest boards out there at less than $11 for the entire board.

I found a manly friend to help me cut it into equal thirds…mainly because there was know way in heck-ola I was ever going to fit an 8ft board into my minivan with 3 carseats (as awesome as my swagger wagon is…).

The 3 pieces easily fit with the seat in the back down, just FYI.

But warning! The board sheds saw dust-looking stuff so make sure to have a rubber mat down if you don’t want to vacuum your car.
I brought it home, put the kids to bed, and got to work. I placed it against the wall to try to “place” visually where I wanted them. (Measuring is the worst, it’s a huge downfall of mine.)

I laid out the wrapping paper and lined up the stripes with the edge of the board to make sure it was straight. (Turns out the stripes were REEEALLY easy to work with, so I recommend it for sure!)

Once lined up, I pulled it tight, and tacked it down all along the edges with good old fashioned staples.

This is what the back of the board looks like:

…and the front.

I did that for all 3 boards, then lined them up and secured them on my wall using #10 screws and matching washers.

The manly friend at Home Depot said to use washers so the screw wouldn’t go too far into the soft board.
Whatever you say, manly friend!

Turns out we had these screws lying around but I bought some at the time anyway because I didn’t want to have to run back to the store. Time is precious with 3 little kids. Anyway, I’m sure any sturdy, long-ish screw would work, so just use what you have lying around.
Moving on… I placed the boards where I wanted them, screwed them directly into the wall, and voila!
Complete awesomeness.

USE WRAPPING PAPER ON YOUR DIY BULLETIN BOARD
There are a few reasons I chose heavy duty wrapping paper:
- It’s WAAAAAY cheaper than fabric, by like one million times
- The bulletin board is going to get HOLES in it. So why use anything nicer?
- That’s how our bulletin boards were in school – covered in paper. That way you can change it out inexpensively and cheaply as often as you’d like.
So there you go! So easy!
Now I can pin all my kids’ masterpieces up with style and panache.

Ahhh… Isn’t that much better?
Once the materials were purchased, the entire project took me about 30 minutes start-to-finish. And everything except the paper and board I had on-hand! So not only was it fast, but this project all-in cost around $12…MUCH better than $332 if you ask me.
Definitely give it a try and let me know how YOURS turns out! Share it on Instagram by using the hashtag #funcheaporfree. I’d really really love to see it 🙂

Looking for even more great ideas?
- Need help getting your budget in order? Use the simplest budgeting envelope system, EVER!
- Help organize your life more by using the block schedule system!
- Learn how to bake bread and really wow your family!
Happy DIY-ing!